---
title: 'Get started with Claude Desktop and Neon MCP Server'
subtitle: 'Enable natural language interaction with your Neon Postgres databases using LLMs'
author: dhanush-reddy
enableTableOfContents: true
createdAt: '2025-02-06T00:00:00.000Z'
updatedOn: '2025-02-06T00:00:00.000Z'
---
Imagine managing your database with natural language. Instead of complex SQL, you can simply ask your AI assistant to "create a new table for customer orders" or "show me last quarter's sales figures." This is the power of the [Model Context Protocol (MCP)](https://github.com/modelcontextprotocol), an open standard for AI interaction with external systems.
This guide will introduce you to [Neon's MCP server](https://github.com/neondatabase/mcp-server-neon), which allows you to use Large Language Models (LLMs) for intuitive database management. At its core, Neon MCP server allows tools like Claude to easily communicate with the [Neon API](https://api-docs.neon.tech/reference/getting-started-with-neon-api).
With Neon's MCP server and an LLM like Claude, you can simplify workflows, improve productivity, and manage your Postgres databases more naturally. Let's explore how this approach can make database management easier and more efficient.
The Neon MCP Server grants powerful database management capabilities through natural language requests. **Always review and authorize actions requested by the LLM before execution.** Ensure that only authorized users and applications have access to the Neon MCP Server.
The Neon MCP Server is intended for local development and IDE integrations only. **We do not recommend using the Neon MCP Server in production environments.** It can execute powerful operations that may lead to accidental or unauthorized changes.
For more information, see [MCP security guidance →](/docs/ai/neon-mcp-server#mcp-security-guidance).
## Understanding MCP
The **Model Context Protocol (MCP)** is a standard that helps LLMs communicate with external tools, like databases and APIs. It's like a translator, making it easier to connect LLMs to services and data. For the Neon MCP server, it's the protocol that lets Claude (and other LLMs) understand and control your Neon databases through the Neon API.
MCP follows a client-server architecture, where a host application can connect to multiple servers. The key components include:
- **Host**: These are LLM applications, such as Claude Desktop or integrated development environments (IDEs), that initiate connections to MCP servers
- **Client**: These reside within the host application and maintain one-to-one connections with individual servers
- **Server**: These programs provide context, tools, and prompts to clients, enabling access to external data and functionalities
### Why use MCP?
Traditionally, connecting AI models to different data sources required developers to create custom code for each integration. This fragmented approach led to increased development time, maintenance burdens, and limited interoperability between AI models and tools. MCP tackles this challenge by providing a standardized protocol that simplifies integration, accelerates development, and enhances the capabilities of AI assistants.
### What is Neon MCP server?
**Neon's MCP server** is an open-source tool that lets LLMs like **Claude manage your Neon databases using natural language by interacting with the Neon API.** It translates your simple English instructions into **Neon API calls**.
Examples of natural language commands that are converted to **Neon API actions**:
- **Create a Postgres database called `my-database`**: Calls the Neon API to create a database
- **Add a column `created_at` to the 'users' table in project `my-project`**: Uses the Neon API to run an SQL command
- **List all my Neon projects**: Calls the Neon API to fetch a project list
### Why use Neon MCP server?
Neon MCP server, combined with Neon, offers:
- **Simple Setup:** Easily connect LLMs to **Neon API**.
- **Natural Language:** Manage databases without direct **Neon API** coding.
- **Empowering Non-Developers**: Intuitive database interaction for everyone.
The Neon MCP server's ability to execute arbitrary commands from natural language requests requires careful attention to security. Always review and approve actions before they are committed. Grant access only to authorized users and applications.
These actions enable any MCP Host to interact with various functionalities of the **Neon platform via the Neon API.** Certain tools, especially database migration ones, are tailored for AI agent and LLM usage, leveraging Neon’s branching for safe preview and commit.
## Setting up Neon MCP server
We'll use Claude Desktop to interact with Neon MCP server. Here's how to set it up:
### Prerequisites
- **Node.js (>= v18):** Install from [nodejs.org](https://nodejs.org/).
- **Claude Desktop:** Install Anthropic's [Claude Desktop](https://claude.ai/download).
- **Neon Account:** Sign up for a free Neon account at [neon.tech](https://neon.tech).
- **Neon API Key (for Local MCP server)::** Get your [Neon API Key](/docs/manage/api-keys#creating-api-keys).
### Setting up Neon MCP Server in Claude
You have two options for connecting Claude to the Neon MCP Server:
1. **Remote MCP Server:** Connect to Neon's managed MCP server using OAuth for authentication. This method is more convenient as it eliminates the need to manage API keys in Claude. Additionally, you will automatically receive the latest features and improvements as soon as they are released.
2. **Local MCP Server:** Run the Neon MCP server locally on your machine, authenticating with a Neon API key.
### Option 1: Setting up the remote hosted Neon MCP Server
By default, the Remote MCP Server connects to your personal Neon account. To connect to an organization's account, you must authenticate with an API key. For more information, see [API key-based authentication](/docs/ai/neon-mcp-server#api-key-based-authentication). Claude connectors currently do not support API key authentication.
Choose one of the following methods to set up the Remote Neon MCP server in Claude Desktop:
1. Launch Claude Desktop and open the **Search & Tools** panel, and select **Add Connector**.

2. Click on **Add a custom one** to open the custom connector modal.

3. Enter **Neon** in the **Name** field and `https://mcp.neon.tech/mcp` in the **Remote MCP server URL** field, then click **Add**.

4. An OAuth window will open in your browser. Follow the prompts to authorize Claude to access your Neon account.
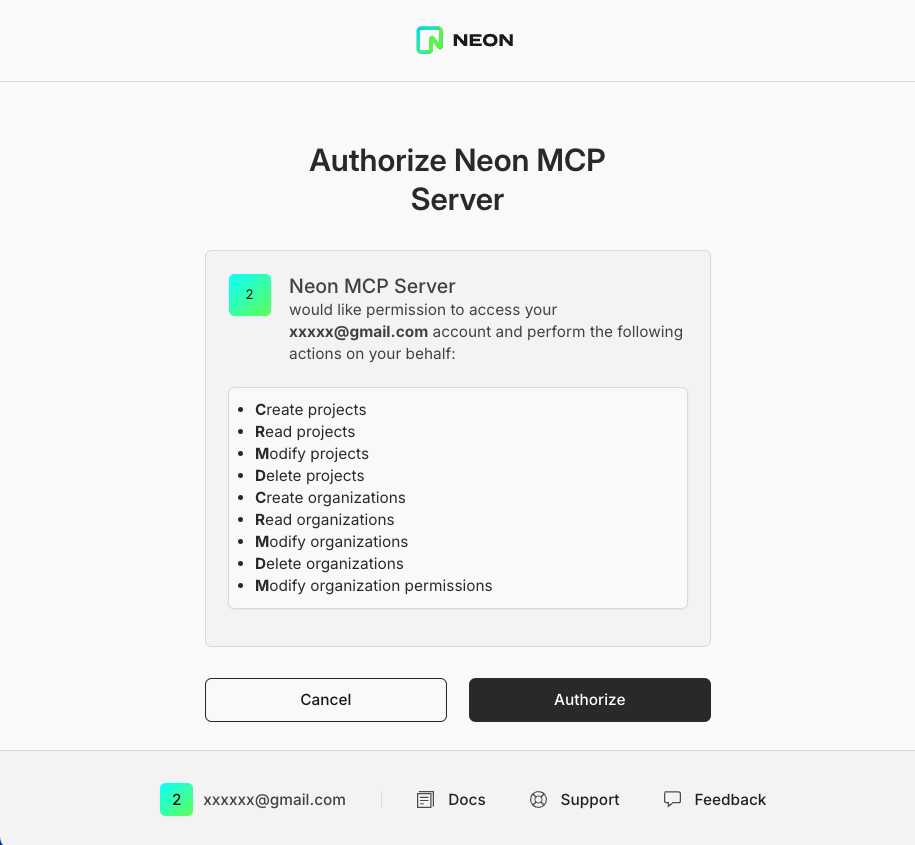
5. After authorization, you can start using the Neon MCP server with Claude.
1. Open Claude desktop and navigate to **Settings**.
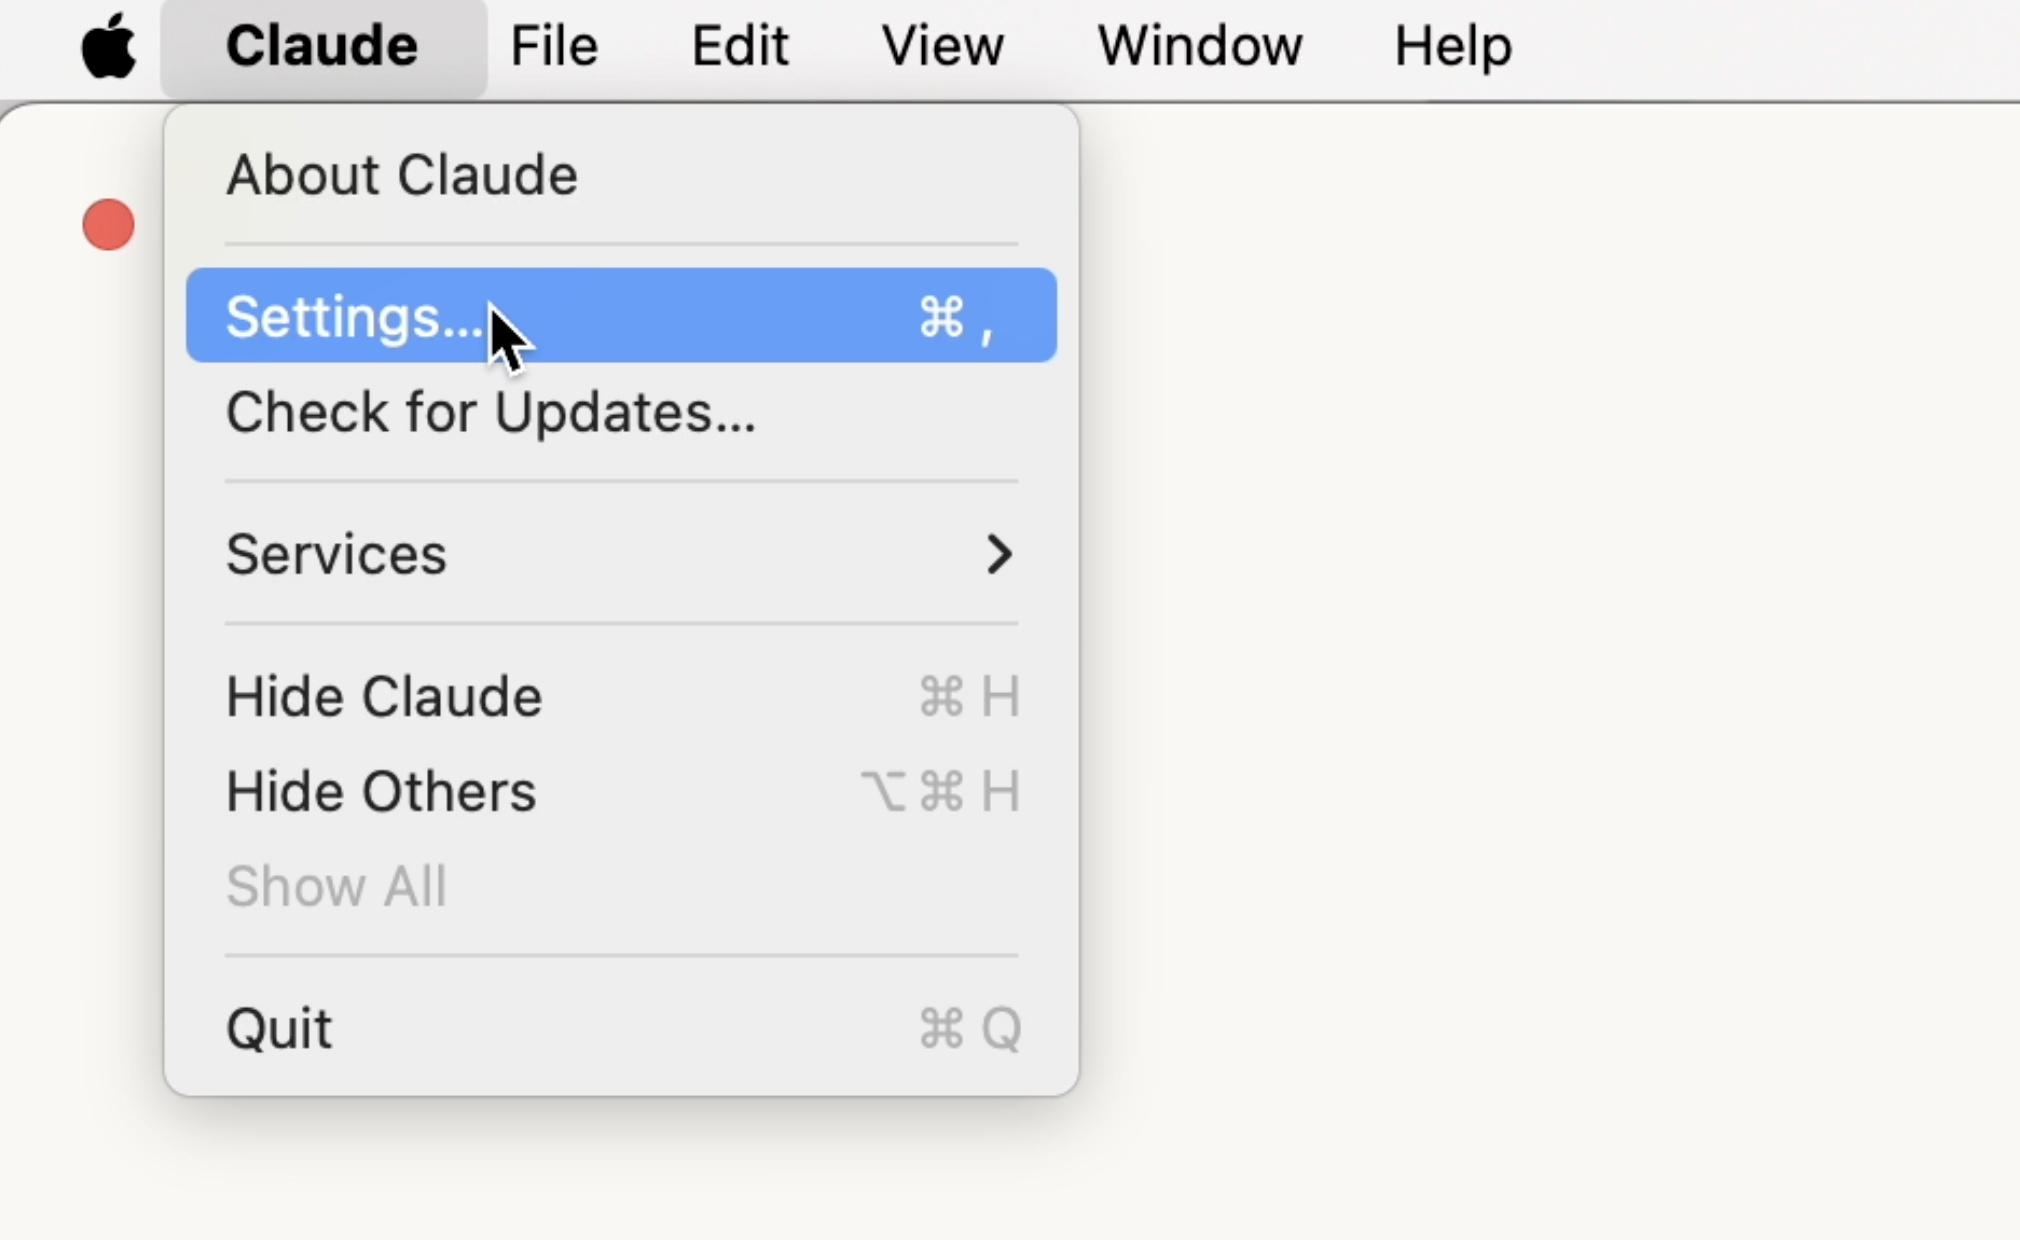
2. Under the **Developer** tab, click **Edit Config** (On Windows, it's under File -> Settings -> Developer -> Edit Config) to open the location of configuration file (`claude_desktop_config.json`).
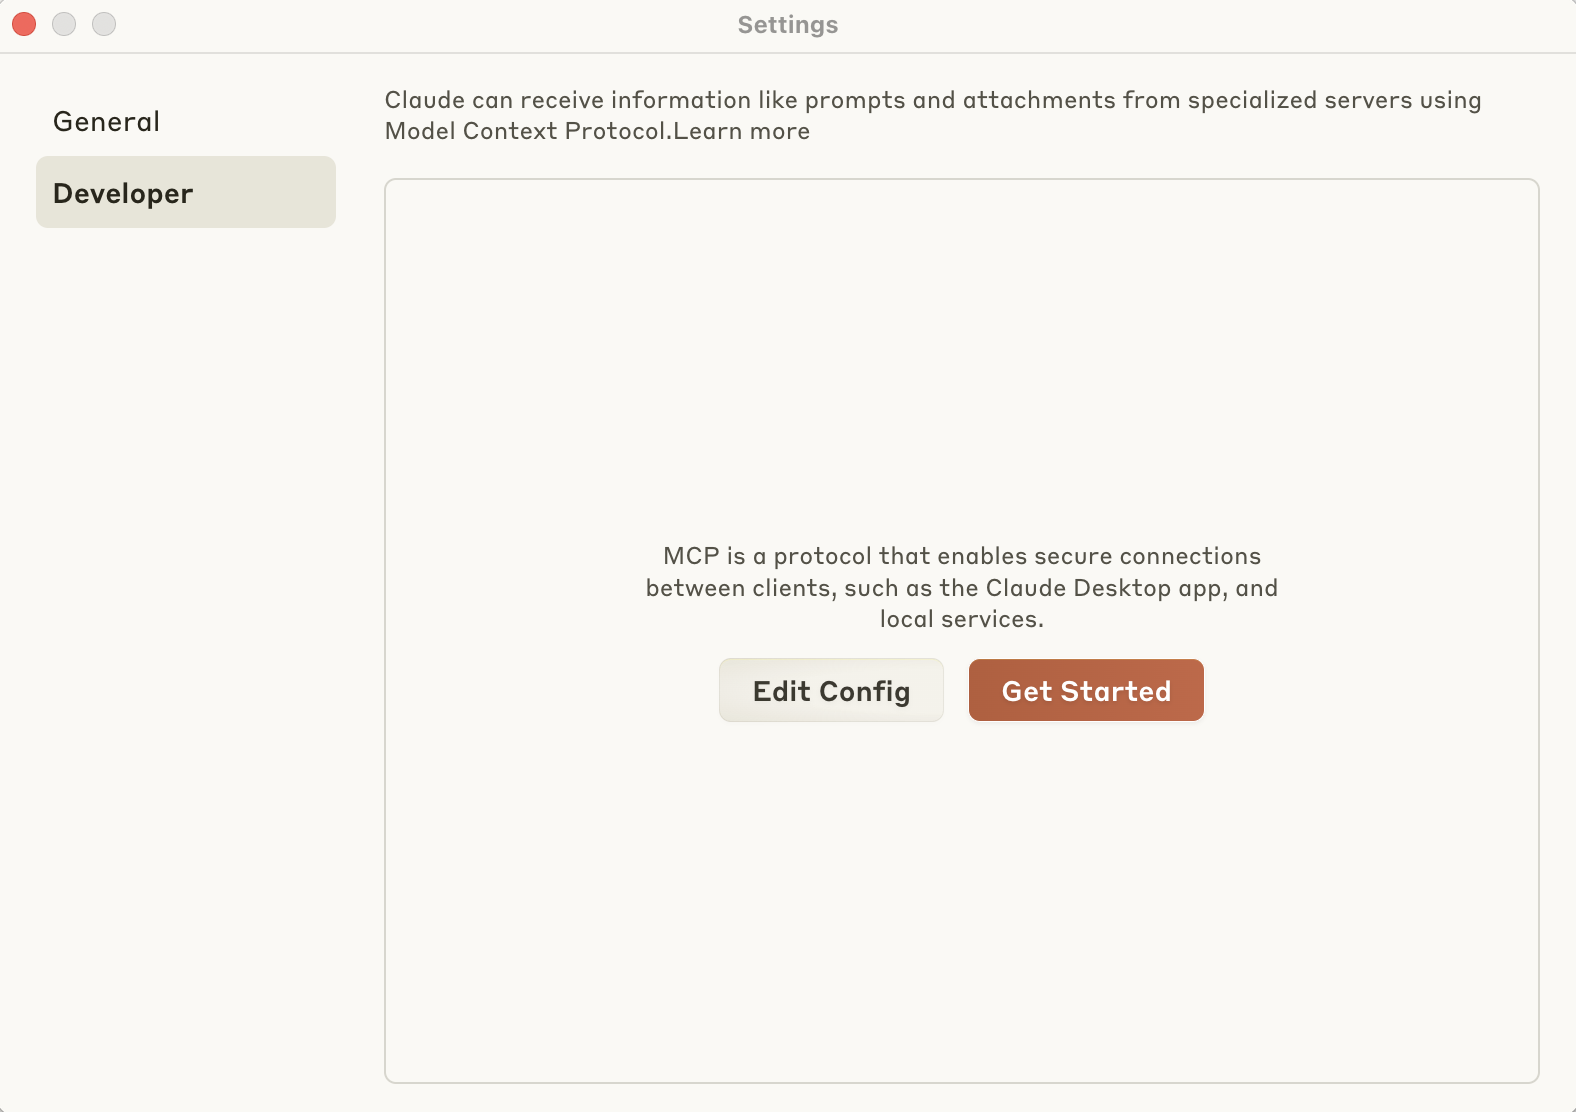
3. Open the `claude_desktop_config.json` file in a text editor of your choice.
4. Add the "Neon" server entry within the `mcpServers` object:
```json
{
"mcpServers": {
"Neon": {
"command": "npx",
"args": ["-y", "mcp-remote@latest", "https://mcp.neon.tech/mcp"]
}
}
}
```
5. Save the configuration file and **restart** Claude Desktop.
6. An OAuth window will open in your browser. Follow the prompts to authorize Claude to access your Neon account.

7. After authorization, you can start using the Neon MCP server with Claude.
### Option 2: Setting up the Local Neon MCP Server
This method runs the Neon MCP server locally on your machine, using a Neon API key for authentication.
1. Open your terminal.
2. Run the following command to install the Local Neon MCP server for use with Claude Desktop:
```bash
npx @neondatabase/mcp-server-neon init $NEON_API_KEY
```
> Make sure to replace `$NEON_API_KEY` with your actual Neon API key. You can generate one through the Neon Console by following the instructions in [Creating API keys](/docs/manage/api-keys#creating-api-keys).
You will be prompted to install the required dependencies. Type `y` to proceed. You should see output similar to this:
```bash
npx @neondatabase/mcp-server-neon init napi_xxxx
Need to install the following packages:
@neondatabase/mcp-server-neon@0.x.x
Ok to proceed? (y) y
Config written to: /Users/USERNAME/Library/Application Support/Claude/claude_desktop_config.json
The Neon MCP server will start automatically the next time you open Claude.
```
3. Restart Claude Desktop. You can do so by quitting the Claude Desktop and opening it again.
### Verifying the connection
You can verify that the connection to the Neon MCP server either remote or local is successful by following these steps:
1. In Claude click on the search and tools icon to see the available tools.
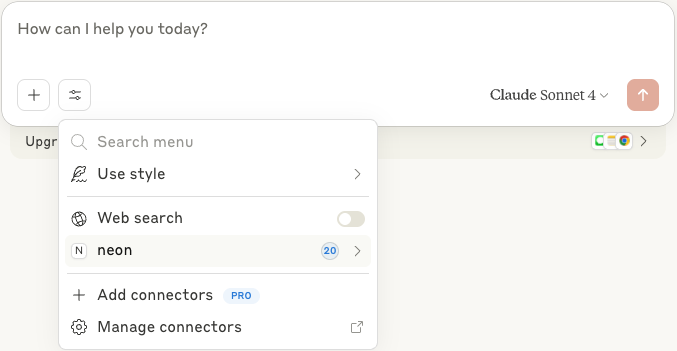
2. You should see the Neon MCP server's tools listed. Click on the **neon** tool to see the available tools in detail.
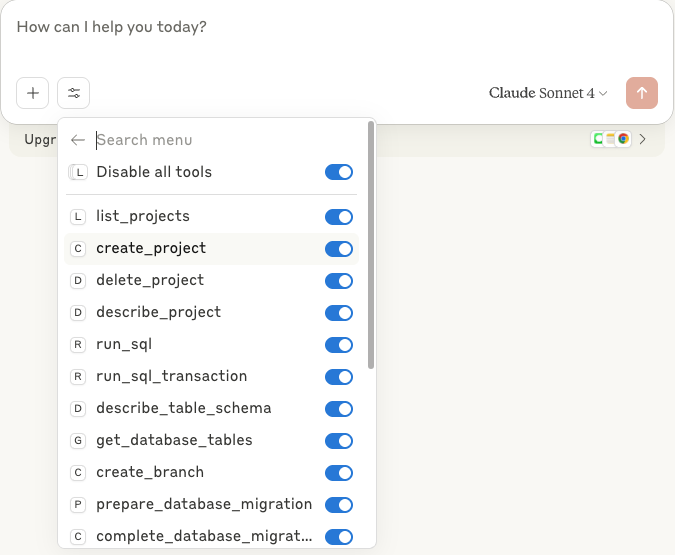
3. Claude is now connected to Neon's remote MCP server.
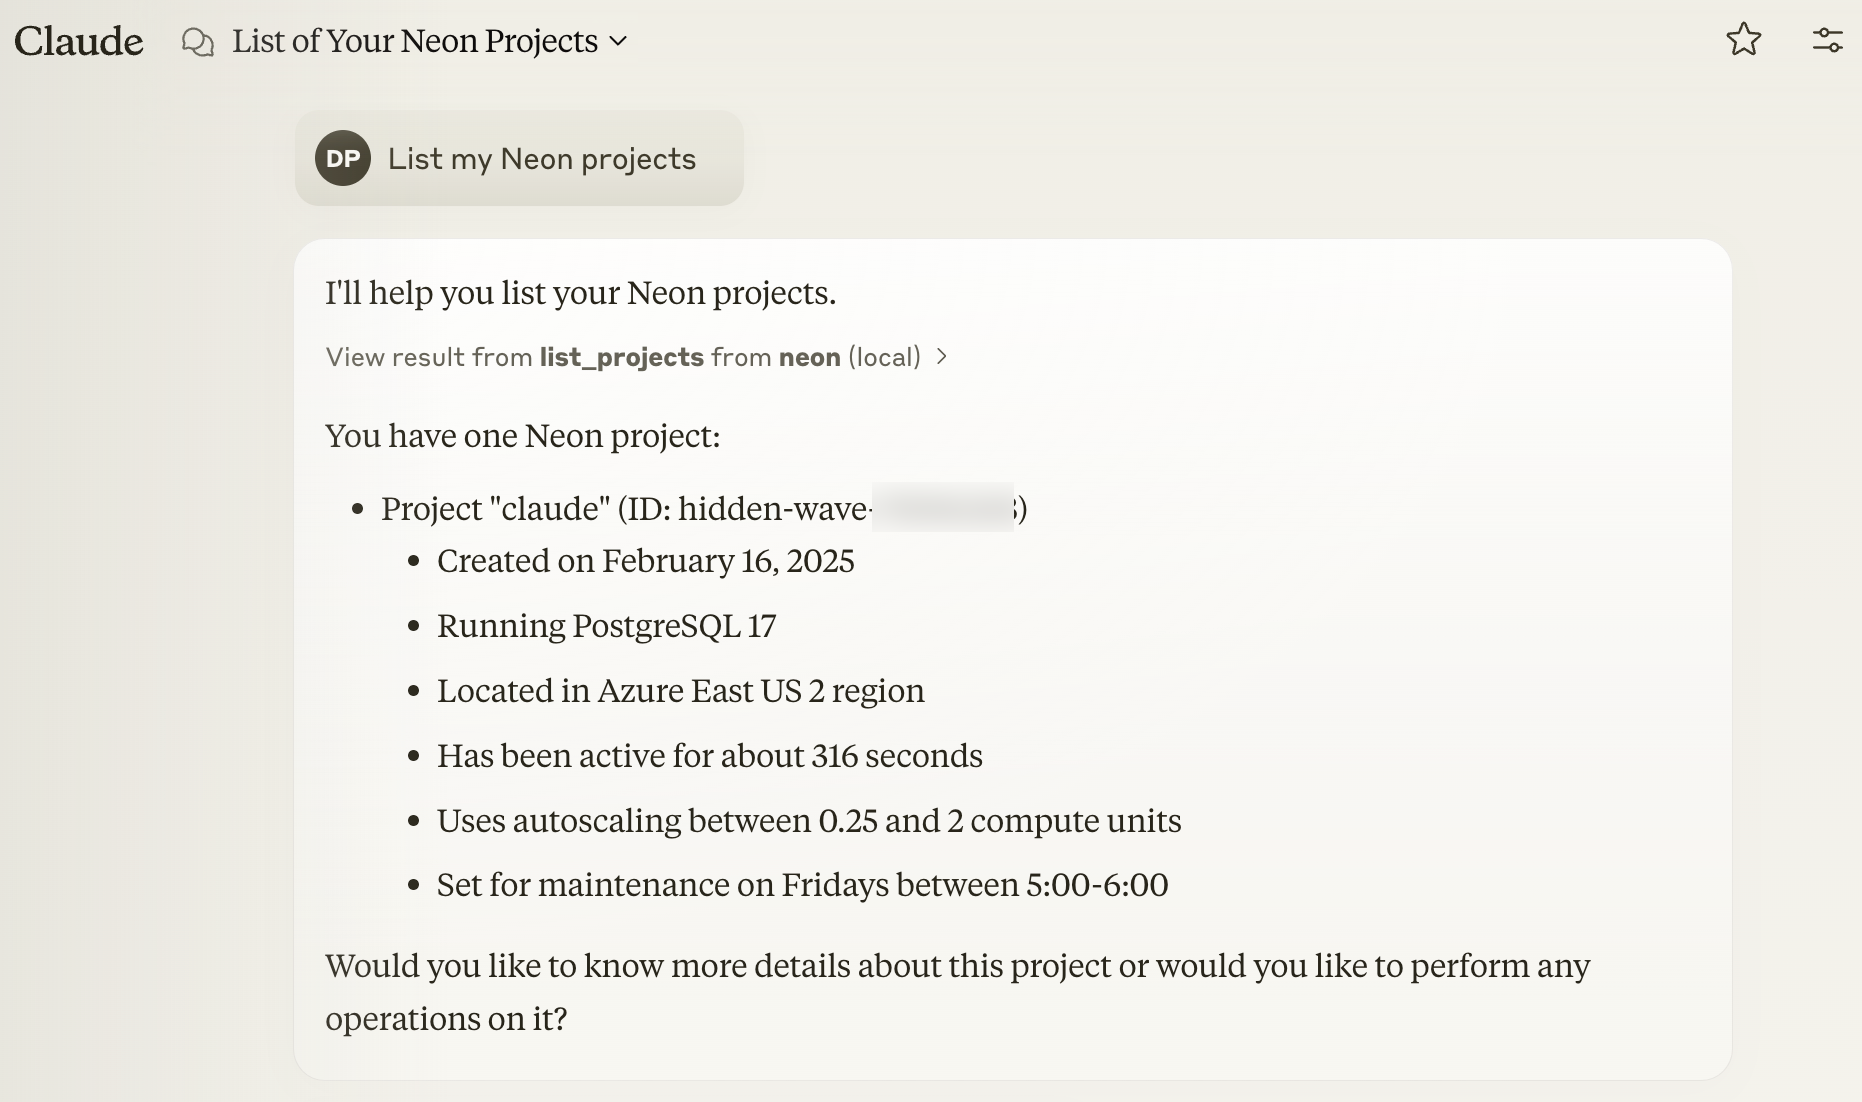
Ask Claude `"List my Neon projects"`. If it works, you'll see your projects listed by Claude, fetched using the **Neon API**. For example, you might see output similar to this:
## Using Neon MCP server
Neon MCP server lets you manage Neon via **Neon API calls**
### Neon platform operations
- **List databases:** `"What databases do I have in my Neon project?"`
- **Create a new Neon project**: `"Create a new Neon named my-project"`
- **Create a new database**: `"Create a new database called my-database in the Neon project named my-project"`
### Simple SQL queries
- **Insert records"** `"Create a table named posts with 20 records."`
- **Query a table:** `"Show me 10 posts from 'posts' table in database 'my-database' of project 'my-project'"` (Triggers `run_sql` action to execute query)
### Schema exploration
- **List tables:** `"What tables are in database 'my-database' of project 'my-project'?"` (Triggers `get_database_tables` action to get table list)
- **Table schema:** `"Show schema of 'posts' table in database 'my-database' of project 'my-project'"` (Triggers `describe_table_schema` action to describe schema)
### Quick example: Neon MCP server in action
Imagine you want to add a column to a table in your Neon project. Instead of writing SQL migrations and directly calling the Neon API, with Neon MCP server and Claude, you can say: `"In my social network Neon project, edit the posts table and add a deleted_at column."`
Using Neon MCP server, Claude will:
1. **Confirm project:** Check which project you are referring to.
2. **Check schema:** Look at the `posts` table structure.
3. **Make migration:** Create the SQL to add the column
4. **Preview changes:** Show you the changes in a safe, temporary branch leveraging Neon's branching feature.
5. **Apply changes:** After you approve, apply the change to your database.
6. **Confirm success:** Tell you the column is added and prompt you to commit the migration.
This shows how Neon MCP server simplifies and makes database management safer with natural language, all powered by the **Neon API** under the hood.
## Real-world use cases
Neon MCP server can be used in various scenarios. Here are just a few possibilities:
- **SaaS apps:** Faster development with natural language database management
- **Dev/Test:** Quick database setup for testing
- **AI agents:** Simple database backend for AI using natural language
- **Internal tools:** Data access for non-technical teams via natural language interaction
## Security considerations
When Claude uses the Neon MCP tool, you'll see an authorization prompt: "Allow tool from "neon"?"

For your security, review the tool's purpose before permitting the operation to proceed. Remember that LLMs can sometimes produce unexpected results, so careful monitoring is always recommended.
## Conclusion
Neon MCP server makes database management conversational and easier by enabling natural language interaction with the Neon API. It simplifies tasks, automates processes, and opens new ways to use AI with databases.
## Resources
- [MCP Protocol](https://modelcontextprotocol.org)
- [Neon Docs](/docs)
- [Neon API Reference](https://api-docs.neon.tech/reference/getting-started-with-neon-api)
- [Neon API Keys](/docs/manage/api-keys#creating-api-keys)
- [Neon MCP server GitHub](https://github.com/neondatabase/mcp-server-neon)